How to Draw Amusement Park Rides: Step-by-Step Guide for Beginners
Drawing amusement park rides is a fun and exciting way to express your creativity. If you’ve ever been to a theme park, you’ve probably admired the intricate details and thrilling designs of the rides. Whether you’re an artist, a theme park enthusiast, or just someone looking to learn a new hobby, drawing amusement park rides can be both challenging and rewarding. In this guide, I’ll take you through a step-by-step process to help you draw your favorite amusement park rides, from roller coasters to Ferris wheels, and everything in between. Let’s dive into the art of capturing the thrill of these iconic structures on paper!
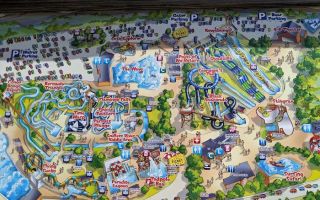
Surge Adventure Park
24 E 33rd St, Edmond, OK 73013, USA
1. Gather Your Materials
Before you start drawing, it’s important to gather all the necessary materials. While you can draw amusement park rides with any type of paper and pencil, having the right tools can make the process easier and more enjoyable. I recommend using a sketchbook or a piece of thick paper that can handle erasing without tearing. For the pencils, a set of graded pencils (ranging from H to B) will help you create different levels of shading and detail. Additionally, an eraser, ruler, and colored pencils or markers for adding final touches will come in handy.
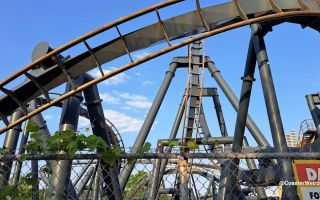
Noah's Ark Waterpark
1410 Wisconsin Dells Pkwy, Wisconsin Dells, WI 53965, USA
2. Start with Simple Shapes
When it comes to drawing amusement park rides, it’s helpful to start with basic shapes. This will act as the foundation of your drawing. For example, if you’re drawing a Ferris wheel, begin with a large circle for the wheel itself, and smaller circles for the seats. If you’re sketching a roller coaster, start with a series of curves and straight lines to represent the tracks. Starting with basic shapes helps you capture the overall structure and proportions of the ride before adding the intricate details.
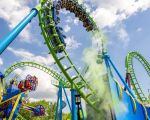
3. Sketch the Main Structure
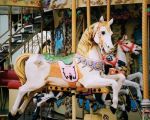
Once you’ve laid the foundation with basic shapes, it’s time to sketch the main structure of the ride. For a roller coaster, this means drawing the track's towering hills, loops, and twists. For a carousel, focus on drawing the central pole and the circular platform. Keep your lines light and fluid, as you may need to adjust proportions or add curves later on. I personally find it helpful to step back and look at the drawing from a distance occasionally to check the proportions and ensure everything looks balanced.
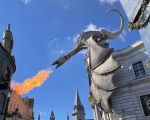
4. Add Details to Bring the Ride to Life
Now comes the fun part—adding details! This is where your drawing will truly begin to take shape. For roller coasters, add the small cars or trains that run along the tracks. For Ferris wheels, add the individual passenger cabins hanging from the wheel. Pay attention to how the seats or cars are attached to the ride. You can also add details like decorative elements, support beams, and even lights if you’re drawing a nighttime scene. The more details you add, the more realistic your drawing will appear.
5. Use Shading and Textures to Add Depth
Shading is a key technique to give your drawing a sense of depth and dimension. Use softer pencils (like B or 2B) to shade in areas that would naturally be in shadow. For example, the underside of a Ferris wheel’s cabins or the inner curves of a roller coaster loop. Textures are also important; roller coasters often have metal tracks, so adding cross-hatching or a light stipple effect can make your drawing look more dynamic. I find that applying shading gradually, starting from the darkest areas and working towards the lighter areas, helps create a smooth, realistic effect.
6. Final Touches: Add Color and Highlights
The final step is to add color and highlights to bring your drawing to life. Use colored pencils or markers to fill in the ride with the colors of your choice. A bright, vibrant palette works especially well for amusement park rides, as they’re often filled with bold colors. Don’t forget to add highlights to give the ride a sense of light reflecting off its surfaces. This can be achieved with a white pencil or gel pen. The final touches of color will make your drawing feel more dynamic and engaging.
7. Practice and Experiment
Like any other drawing technique, mastering the art of drawing amusement park rides takes practice. I’ve found that the more I draw, the more confident I become in adding details, experimenting with shading techniques, and exploring different perspectives. Don’t be afraid to try new things, such as drawing rides from a bird’s-eye view or capturing the action of a ride in motion. Experimentation allows you to push your boundaries and improve your skills over time.
Conclusion: Embrace Your Creativity
Drawing amusement park rides is a fantastic way to explore your artistic abilities while capturing the excitement of these iconic structures. Whether you’re sketching a thrilling roller coaster, a colorful carousel, or a towering Ferris wheel, there’s no limit to how creative you can get. By starting with simple shapes, focusing on structure, adding details, and experimenting with shading and color, you’ll soon be able to bring your favorite rides to life on paper. So grab your pencils, start sketching, and embrace your creativity as you learn how to draw amusement park rides!